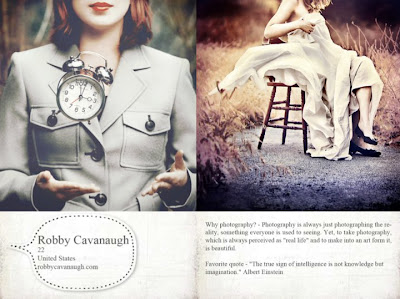
Image is from http://www.facebook.com/robbycavanaugh?ref=ts
Ever wondered about how professional photographers did wonders with their expensive DSLR cameras and fancy equipments?
This question has been around among regular people and people who had received art education in a university, but majority of us can't tell you how the trick of the trade is done. Not because we don't want to tell you the secret to look smart, it's simply because we don't know either. That is why when ASA (art student association) posted out a workshop on how one of the current graphic design student who happens to be a professional photographer did his magic, I signed up for attending on Facebook the minute I saw the post two weeks ago.
I went to the workshop today and found out his tricks. To my astonishment, it is something that I've known for years (I received my BFA in Graphic Design from Cal Poly, so yes, I am an alumni), but I just never thought it could be "played" this way.
Robby Cavanaugh, the speaker today, told us what tool he used: Photoshop. He showed us couple of YouTube videos that he recorded and uploaded to YouTube to show us how he did the tricks. Robby told us all those great photos out there done by professional photographers are HEAVILY EDITED after they took the photos. So there shouldn't be any guilt if we want great photos and we have to do the same to get there. He said he noticed that a lot of people in art department is just like him when he first started, he was kind of afraid to retouch the photos because it was kind of like cheating in a way. Since all the photographers do that for great photos, he later on changed his perspective and attitude towards post-editing.
What Robby did in photoshop to edit his photos are:
1) Begin with the dodge tool and burn tool to enhance the object that he wants to emphasize.
2) Go to use Edit--> Adjustment--> Curve to change the general colors.
3) Go to Edit--> Adjustment--> Color. Fine any brush, change the blending mode (do this at the Layer window), change the opacity %, and pick a color. This is to enhance the color in general.
4) Masks--this is to combine with the gradient tool so you can create a gradient on the entire photo.
5) Sharpen and Vignette
Sharpen is to make your object super sharp, but the bad thing is, if the photo quality is low, the piexelated area will be more visible, so you have to beware of that. Filter-->Other--High pass, enter a number between 2.5-4 pixels. Then go to blending more and choose Overlay on the right hand side of the canvas (where Layer window is at). You can use eraser tool on the left tool bar to erase areas you don't want it to sharpen.
Vignette, that is to darkened corners around 4 corners of your photo. Use Dodge tool, change exposure to 30% around photos corners.
Once I get Robby's Youtube video links from him, I'll post that here too, but so far, I only have his photography website. If you like his work, and you want to hire him to do your graduation photos/portraits/wedding/engagement, you can ask him and discuss the price/location!
http://www.robbycavanaugh.com
DEar Catherine!
ReplyDeleteMay I ask a few more details about this editing process? Do you have the youtube videos from Robby?
I am really intrested in these techiques. I don't know your e-mai ladress but here is mine :
szalci80@gmail.com
if you could contact me would be great! Thank you in advance!
Bes twishes from Hungary!
Laci
Sorry, i misstyped my e-mail adress, here is the right one:
ReplyDeleteszlaci80@gmail.com